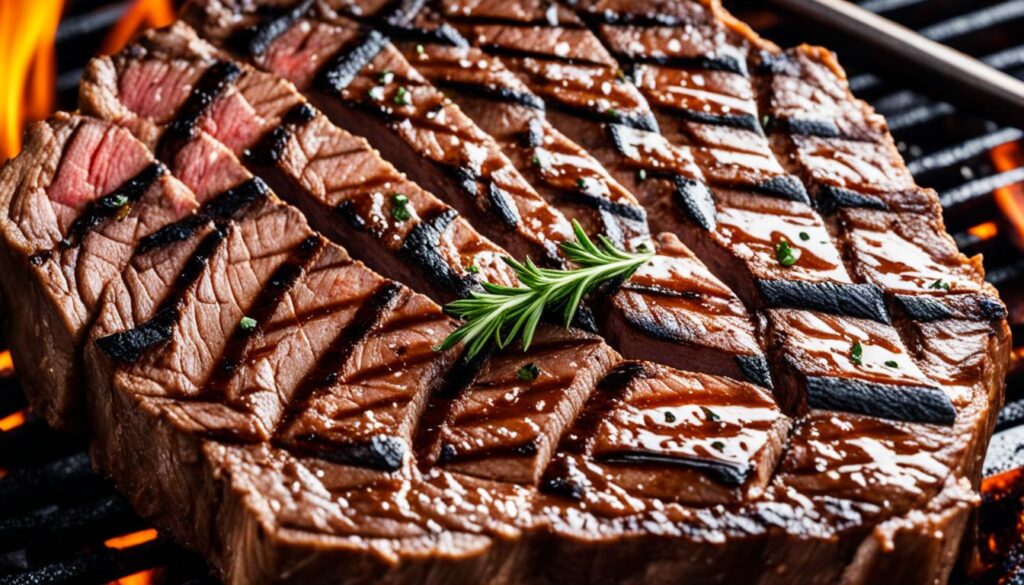
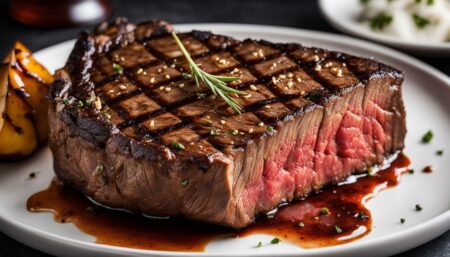
The tantalizing sight of perfect grill marks on a steak isn’t just about presentation—it’s an indication of flavor-packed goodness that comes with expertly grilling steak. Those defined charcoal lines, the hallmark of a well-grilled piece of meat, are not just for show. They signify a culinary milestone in achieving the Maillard reaction, a flavor-enhancing process occurring at the precise point where the steak kisses the hot grill. While creating beautiful grill marks on steak can seem daunting, we are here to guide you through grilling steak with perfect grill marks every single time.
Whether you are an aspiring grill master or a seasoned pro looking to refine your technique, understanding how to achieve perfect grill marks on steak is crucial for elevating your grilling repertoire. Step by step, you’ll learn to master the art of the grill, delighting your palate and impressing your guests with each savory bite.
Key Takeaways
- Understanding the importance of grill marks in terms of both aesthetics and the Maillard reaction is key to creating a superior steak grilling experience.
- Proper grill preparation, including preheating and oiling, is essential for achieving those well-defined char lines.
- Positioning and timing of your steak, alongside using the right technique, matters greatly in creating those sought-after diamond-shaped marks.
- While grill marks are visually appealing, they are indicative of flavor development that can be enhanced through specific grilling techniques.
- Utilizing the full grill surface for an all-over sear can enhance taste and provide a consistently superior end product.
The Secret to Perfect Grill Marks on Steak
Achieving grill marks on steak that parallel those seen in lauded steakhouses isn’t confined to the realm of professional chefs. With the right steak grill mark tips, it’s a triumph that’s thoroughly within your reach. Whether you’re a weekend warrior at the BBQ or an earnest culinary enthusiast, mastering the technique for perfect grill marks on steak is about fundamental steps carried out with precision.
One of the prime tips for getting grill marks on steak starts with the preparation phase—employing clarified butter. Its higher smoke point than regular butter is the key to crisp, well-defined grill marks without the aftermath of sticking or burning. The further this fat is clarified, the better it can handle the high heat necessary for searing, allowing the steak to release effortlessly from the grill grates.

So how do we ensure these marks are nothing short of professional-looking? Here is the breakdown of tips:
- Preheat your grill to a high temperature to ensure immediate searing upon contact.
- Generously apply clarified butter to the steak surface to promote even heat distribution and flavor richness.
- Place the steak on the grill at a high angle, initiating the iconic diagonal pattern associated with those pristine grill marks.
- Avoid flipping the steak too early. Patience here ensures your grill mark’s depth and definition.
Striking that precise balance between timing and the steaks’ arrangement on the grill grates ensures that every steak is a visual and gastronomic delight. Here are the crucial steak grill mark tips to follow:
| Step | Action | Result |
|---|---|---|
| 1 | Heat the grill to optimal temperature | A ready and responsive cooking surface |
| 2 | Brush steak with clarified butter | An even, non-stick surface that enhances flavor |
| 3 | First placing | Lay steak at a 45-degree angle to grates |
| 4 | Initial searing period | Branding the steak with the starting lines |
| 5 | First rotation | Rotate steak 45 degrees opposite |
| 6 | Second searing period | Creating the crosshatch effect |
| 7 | Flipping over | Cautiously turn over to imprint on the other side |
For steak aficionados keen on how to get professional-looking grill marks on steak, the painstaking clarity of your marks will not merely draw the eye but also gather appreciation for the flavors retained within. It’s not just a sizzle; it’s an artful sear that elevates your grill game to new sumptuous heights—making your next steak a centerpiece for both presentation and taste.
Cleaning and Preparing Your Grill for Steak
For those enthusiastic about achieving grill marks on steak, the journey begins long before the meat hits the flames. It’s about meticulous preparation to create the perfect stage for your steak.
Cleaning Grill Grates for Optimal Performance
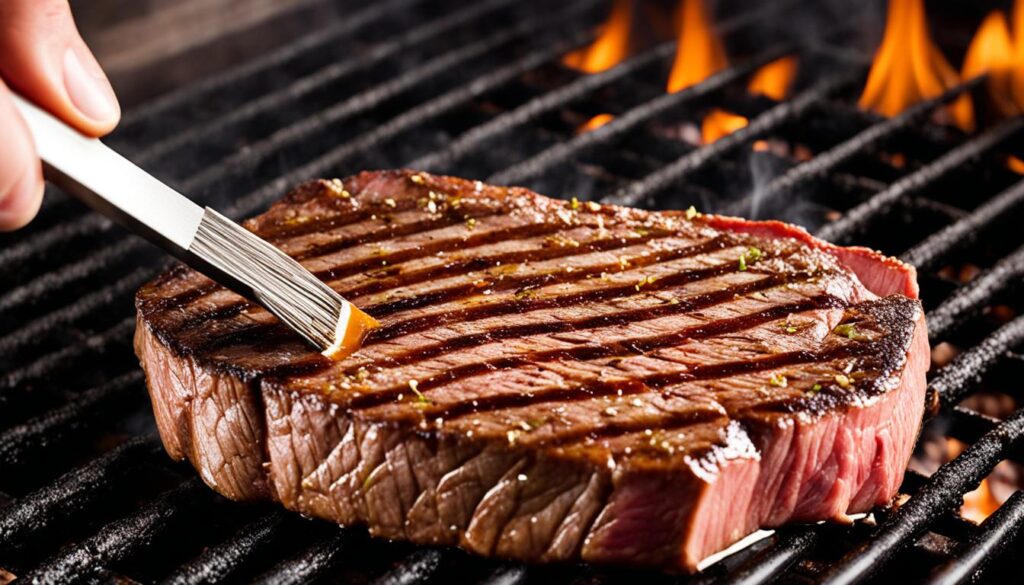
Begin with the foundational step of cleaning grill grates. Pristine grates are not merely about hygiene; they are directly tied to the culinary magic of grill marks on your steak. Over time, grates accumulate burnt remnants and rust that can impede heat transfer, resulting in subpar sear marks. The ritual of scrubbing your grill grates might seem tedious, yet it is a rite of passage towards the perfect steak. Employ a sturdy grill brush post-grilling when the grates are still warm, and remember to attend to this task regularly to maintain superior performance of your grill.
Oiling the Grill Grates: An Essential Step
Oiling the grates is just as crucial, and using high-heat cooking oil is the not-so-secret ingredient for non-stick success. A light coating will suffice; an oil-soaked paper towel gripped by tongs can glide over the grates offering the perfect sheen. This action creates a non-stick layer, encourages even heating, and contributes to the golden, crisp grill marks that will adorn your steak. It’s not simply about a barrier; it’s about setting the stage for excellence.
In summary, the diligence devoted to prepping your grill will pay dividends in each tender, perfectly charred bite. Embrace the cleaning and oiling rituals to ensure your steak grilling game is always at its peak.
The Ideal Grill Temperature for Steak
One of the secrets to grilling the perfect steak lies in mastering the heat of your grill. Whether you’re cooking up a T-bone or a tenderloin, achieving the ideal grill temperature for steak is critical for both those picturesque grill marks and the delicious taste of your meat. Striking the balance between a medium-high heat and a surface that’s just scorching enough requires knowledge and a bit of finesse.
Grill grates should be preheated to a toasty 500 – 550°F to ensure that perfect sear. Rushing in before the grill is ready can leave you with gray, lifeless beef, rather than the succulent, restaurant-quality steak you’re aiming for. To achieve the desired doneness, patience is key; allow the grill to preheat with the lid closed for at least 15 minutes, creating an evenly heated cooking surface.
| Doneness | Internal Temperature | Preheat Time (Minimum) |
|---|---|---|
| Rare | 120°F – 130°F | 15 minutes |
| Medium Rare | 130°F – 135°F | |
| Medium | 135°F – 145°F | |
| Medium Well | 145°F – 155°F | |
| Well Done | 155°F – 165°F |
Monitoring the temperature doesn’t just stop at the grill grates. The internal temp of your steak is where the magic happens — or doesn’t. An instant-read thermometer proves to be an invaluable tool in this respect, lending precision to your grilling game. Simply insert the thermometer into the thickest part of the steak to ensure it’s reached its desired doneness without falling victim to the flames.

- Preheat your grill to a medium-high heat (500 – 550°F).
- Allow the grill to preheat with the lid closed for consistent heat.
- Use an instant-read thermometer to check for desired doneness.
- Avoid constant checking; give your steak time to develop those grill marks.
Achieving greatness on the grill isn’t just an art; it’s a science where heat plays a pivotal role. Keep those flames in check, and the grill at the right temperature, to serve up a steak that’s sure to impress.
Grill Marks on Steak Technique: Timing and Positioning
Mastering the grill marks on steak technique is not just about heat; it’s an art form that requires precision and timing. To achieve diamond-shaped grill marks, imagine your steak as the face of a clock. The initial placement plays a pivotal role, positioning the steak so that the ends point towards 10 and 4 o’clock, with the center as the axis point.
As the steak sears and the proteins begin to form those appealing char marks, prepare for the crucial moment. Once the steak no longer sticks to the grill grates, enact a quarter turn, shifting the steak to the 2 and 8 o’clock positions. This 45-degree rotation will imprint the remaining lines needed to complete the diamond pattern.
- Position steak at 10 and 4 o’clock (first axis point).
- Sear until it releases easily; this ensures the meat will not tear, preserving the aesthetic.
- Rotate steak 45 degrees to 2 and 8 o’clock (second axis point) for a quarter turn.
- Flip steak to sear the opposite side of the steaks, repeating steps 1 to 3.
| Side of Steak | Initial Position | Rotation | Final Position |
|---|---|---|---|
| First | 10 and 4 o’clock | 45-degree quarter turn | 2 and 8 o’clock |
| Second | Flip to opposite side | Repeat rotation | Mirror initial position |
Keep watch on the grill’s hotspots and the steak’s response to the heat to ensure even cooking and marking. Repeat the process, remembering that each steak has its own characteristics. Factors such as thickness and cut affect the searing time, so stay alert to avoid overcooking. By integrating these steps and paying close attention to the response of the meat, perfectly grilled delights are within reach.
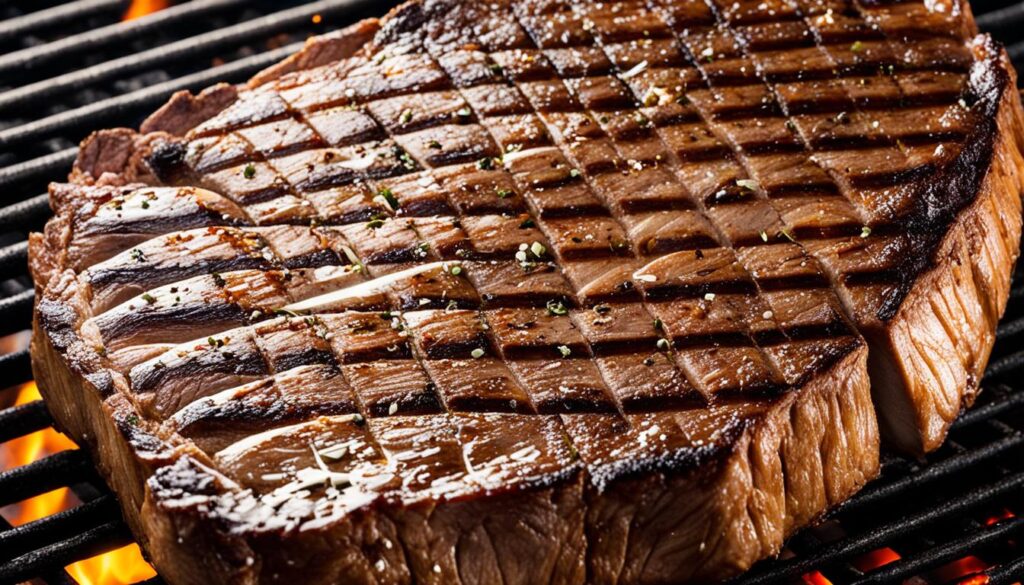
Remember, timing and positioning are your greatest allies in this culinary endeavor. With practice, you will swiftly move from the initial theory to serving up plates graced with perfectly marked steaks — the hallmark of grilling prowess.
Understanding the Maillard Reaction and Grill Marks
The pursuit of beautifully seared steak is not just an art—it hinges on a key scientific concept known as the Maillard reaction. This chemical reaction is instrumental in developing the rich palette of flavors we associate with perfectly grilled steak. Let’s delve deeper into this reaction and its role in creating not just visually appealing criss-crossed grill marks, but also taste sensations that are simply unparalleled.
What is the Maillard Reaction?
At its core, the Maillard reaction is a culinary phenomenon activated by high heat, where a chemical reaction occurs between amino acids and reducing sugars present in the meat. This interaction results in the formation of new compounds that contribute to color and complex flavors. When a steak is exposed to the intense heat of a grill, it’s the Maillard reaction that transforms the entire surface into an appetizing, golden brown color with an array of savory flavors.
How Grill Marks Relate to the Maillard Reaction
Grill marks are quintessential to any steakhouse presentation, serving as evidence of the Maillard reaction at work. However, these sear marks are typically localized to the points of contact between the steak and the grill grate. For a flavor experience that captivates with every bite, it’s desirable to coax this reaction over the steak’s entire surface. A uniform golden-brown crust not only pleases the eye but takes the culinary journey to new heights of taste by ensuring a complete Maillard reaction.
| Attribute | Impact on Steak |
|---|---|
| Maillard Reaction | Complex flavors developed through high-heat chemical process |
| Entire Surface Searing | Enhanced taste profile with uniform golden-brown color |
| Grill Marks | Signify focused Maillard reaction and add visual appeal |
| Internal Temperature | Ensures desired doneness and maximizes flavor through proper heating |
In conclusion, while criss-crossed grill marks might be the signature of a seasoned griller, it’s the Maillard reaction that’s the hidden hero, embellishing your steak with the memorable flavors associated with top-tier grilling. Achieving this perfect chemical ballet requires attention to both the internal temperature and the technique of searing across the entire surface—a testament to the science of good eating.
The Two-Zone Grilling Method Explained
The essence of the two-zone grilling method lays in its ingenious strategy of utilizing both direct and indirect heat within a single grill session. This technique is pivotal for anyone looking to master the craft of grilling, as it offers the flexibility necessary to produce impeccably cooked meals with rich, smoky flavors and perfectly seared exteriors.
Setting up for Indirect Grilling
To implement a two-zone setup on your grill, begin by creating a clear divide between the direct and indirect sides. If using a gas grill, this typically involves setting one side to medium-high heat while leaving the other side unlit or on a much lower setting. Those with charcoal grills can concentrate the coals on one half, leaving the other devoid of heat. Among the benefits, this arrangement affords a crucial buffer zone—a space where actions are not dictated by flare-ups or the pressing need to rescue food from too-high temperatures.
The Benefits of Using a Two-Zone Grilling Setup
Grilling aficionados often swear by the two-zone method due to its versatility and control. By utilizing indirect grilling on the cooler side of the grill, foods like thick-cut steaks or bone-in poultry can be brought slowly up to the ideal internal temperature without the exterior becoming overly charred or dried out. Cast-iron grates, known for their superior heat retention and distribution, are especially effective in this approach, providing a consistent surface for indirect cooking. Once the desired internal temperature is nearly reached, food can be transferred to the hotter side for the quintessential sear that encapsulates all the desired grill qualities: texture, color, and taste.
Here is a brief comparative insight into direct vs. indirect grilling:
| Direct Grilling | Indirect Grilling |
|---|---|
| High, direct heat | Lower, ambient heat |
| Quick searing and cooking | Slow cooking; ideal for smoking |
| Best for thin cuts | Ideal for thick, large, or tough cuts |
| Risk of burning or charring | Reduced risk of overcooking |
| Allows for grill marks | Evenly cooks without high heat |
By embracing the two-zone grilling method, grillers can confidently tackle an array of dishes, from succulent roasts that fall off the bone to vegetable sides infused with a gentle, smoky depth. Through careful management of medium-high heat and an accepting recognition of the indirect side’s mellow embrace, the culinary realm of grilling expands, welcoming even the most delicate of foods to the fiery stage.
Mastering the Reverse Sear Technique with Thick Steaks
The reverse sear is a game-changer for anyone passionate about grilling the perfect thick-cut steak. By gently bringing the meat to temperature on the indirect side of the grill, you preserve the juicy tenderness within. As the steak’s internal temperature approaches 115°F, its time on the high heat, direct heat side ensures a delectable crust enveloping the entire surface.
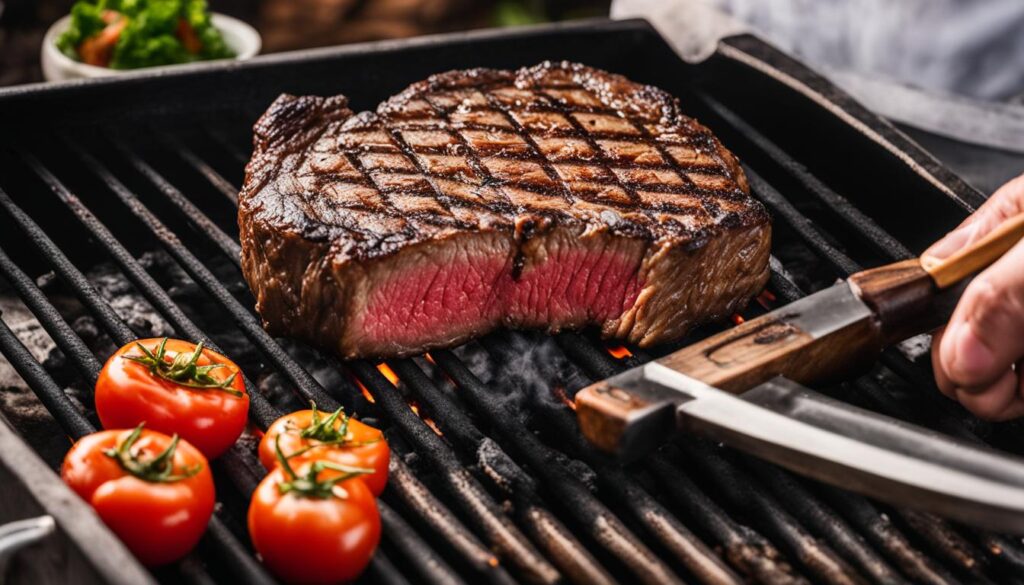
Not only does this method produce a steak that’s evenly cooked from edge to center, but it also adds a beautiful, savory crust that’s irresistible. Here’s a comprehensive guide to ensure your reverse sear technique yields impeccable results every time:
- Start on the Indirect Side: Begin by cooking your steak gently on the cooler part of the grill until it nears the perfect internal temperature.
- Move to the Direct Heat Side: Transfer your steak to the area of the grill over high heat to create a beautiful, even crust across the entire surface.
- Monitor Internal Temperature: Use a reliable thermometer to ensure your steak reaches the desired level of doneness without guesswork.
- Flip Frequently: Ensure even cooking and browning by flipping and rotating your steak regularly on the direct heat side.
| Grilling Stage | Indirect Side | Direct Heat Side | Internal Temp. Goal |
|---|---|---|---|
| Initial Cooking | Yes – Low & Slow | No | Approx. 115°F |
| Finishing Sear | No | Yes – High Heat | Desired Doneness |
| Resting Time | Off Grill | Allow for Temp. Increase | |
With some practice and attention to detail, the reverse sear will become your go-to for grilling thick steaks perfectly. Enjoy the process and anticipate the moment you cut into a juicy, flawlessly cooked steak that’s bound to impress.
Cooking Steak Beyond Grill Marks: Achieving an All-Over Sear
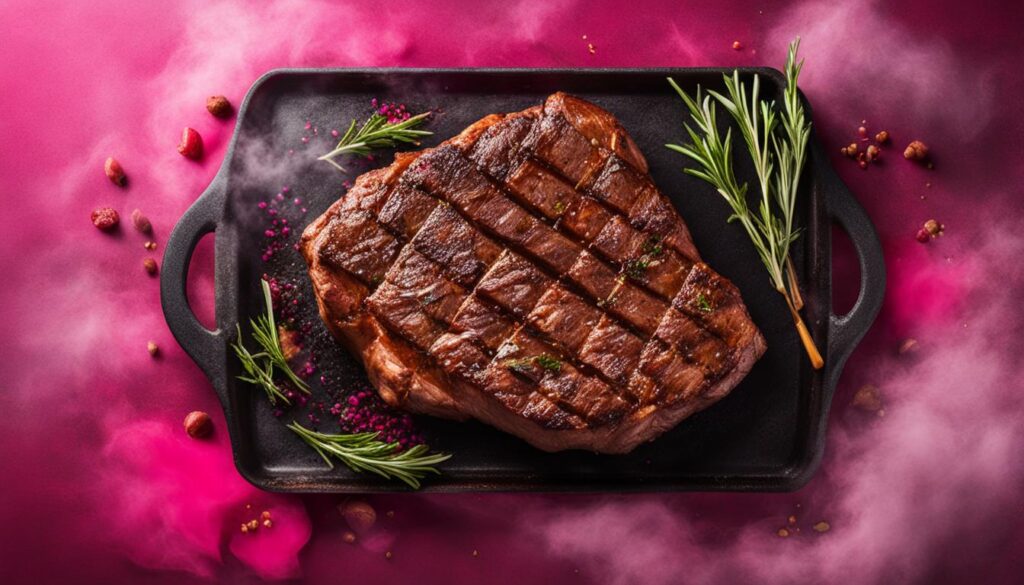
For those who consider themselves connoisseurs of a well-cooked steak, achieving that all-over sear is a mark of culinary expertise. While perfect grill marks can hint at professional cooking, they only provide a hint of what can be a fully realized flavor. True greatness lies in ensuring caramelization across the entire surface of the steak, enveloping the center of the meat in a taste-packed crust that offers a substantially better flavor.
A flawless sear on a steak isn’t just a happy accident; it’s the outcome of understanding that your grill grate is a good conductor of heat, meant to be utilized in its entirety. Submerging your steak in this evenly distributed, scorching embrace guarantees that every slice is encrusted with that desirable golden-brown patina.
“Great cooking is about more than just the marks; it’s about the story that unfolds across the entirety of the steak’s surface—a story told in rich flavors and bold textures.”
- Preheat the grill to a high temperature to ensure your grate is ready to induce that all-important Maillard reaction.
- Pat the steak dry to remove any excess moisture, complementing the natural oils and fats that contribute to the sear.
- Position the steak on the grill, using every inch of space to create a uniform char.
- Flip the steak at intervals, allowing the intense heat to embrace every part of the steak’s surface equally.
By following these simple steps, steaks exit the grill not only with appealing grill marks but with an authenticity and depth of flavor that are telltale signs of a masterfully cooked cut of beef.
| Grill Technique | Flavor Profile | Cooking Result |
|---|---|---|
| Perfect Grill Marks | Charred and Smoky | Visually appealing with localized flavor |
| All-Over Sear | Rich and Caramelized | Uniformly cooked with enhanced flavor |
Grill Marks on Steak: How to Achieve Perfection Every Time
Achieving those distinctive diamond-shaped grill marks on a steak is a testament to grilling mastery. For steak enthusiasts and chefs alike, the allure of creating beautiful grill marks on steak is not just about the presentation; it’s an indication of perfectly executed cooking. With some simple steps and the right tools, such as a clean grill grate and an instant-read thermometer, you too can impress with aesthetic appeal and delectable flavor in every bite.
Placing Steaks for the Classic Diamond Grill Marks
To start, the grill must be adequately preheated to ensure steady, medium-high heat throughout the cooking process. Proper placement of the steak is crucial to form the diamond grill marks. Initially, position the steak on the grill grates at a 45-degree angle to the lines of the grate. This results in one set of lines. After searing for a few minutes, rotate the steak another 45 degrees to create the second set of lines.
Tips for Creating Beautiful Grill Marks on Steak
- Ensure your grill lines are clean as residue can interfere with heat transfer and result in uneven grill marks.
- Do not move the steak too soon; wait for it to release naturally to ensure sharp, unbroken lines.
- Use an instant-read thermometer to check for the perfect internal temperature without disrupting the sear.
- After achieving grill marks, relocate the steak to a cooler part of the grill to finish cooking to the desired doneness.
- Allow your steak to rest for a few minutes before serving to let the juices redistribute, preserving the steak’s moisture and flavor.
Following these guidelines will help to ensure that your steak not only looks amazing with those diamond-shaped grill marks but also tastes sublime. Now, let’s explore how to execute each step with precision.
| Step | Action | Outcome |
|---|---|---|
| 1 | Preheat the grill to medium-high heat. | A ready and evenly heated surface for grilling. |
| 2 | Place steak at a 45-degree angle to grill grates. | Foundation for the first set of grill lines. |
| 3 | Sear until steak releases easily, then rotate 45 degrees. | Second set of lines forms the diamond pattern. |
| 4 | Check internal temperature with an instant-read thermometer. | Ensures proper doneness without guesswork. |
| 5 | Rest the steak to redistribute juices. | Steak retains its moisture and flavors upon cutting. |
Rest assured, these steps will guide you in making those perfect, diamond-shaped grill marks that will elevate your grilling game to the level of steakhouse professionals. Fire up the grill and get ready to impress your guests with not only a feast for the taste buds but a visual masterpiece on the plate.
The Role of Fats in Grilling: Clarified Butter for Perfect Sear Marks
The pursuit of perfect sear marks on your steak isn’t merely about aesthetics; it’s a flavor quest, with fats being the unsung heroes of the grilling realm. Clarified butter, a staple in cuisine for its rich, nutty flavor, steps into the spotlight when grilling a steak or embarking on the grilling game. Its high smoke point makes it an ideal companion for high heat cooking, providing a protective layer that not only ensures those grill lines are well-defined but also imparts a luxurious taste and texture to the meat.
One might wonder how to make clarified butter. The process is straightforward: by melting regular butter and skimming off the milk solids, you are left with a pure butterfat that stands up to the rigors of grilling without burning. This preparation is easy to master and pays dividends in the quality of your grilled dishes.
| Ingredient | Role in Grilling | Benefits for Sear Marks |
|---|---|---|
| Clarified Butter | High-heat cooking fat | Clean, crisp lines; enhances flavor and texture |
| Standard Butter | Common cooking fat | Prone to burning; less defined grill marks |
| Olive Oil | Low to medium heat cooking fat | Can impart flavor but has a lower smoke point |
| Vegetable Oil | Neutral high-heat cooking fat | Decent sear marks; lacks flavor enhancement |
When you slather your steak with clarified butter before it hits the grill, you’re setting the stage not just for fats in grilling to work their magic, but for a sensory experience. The milk solids in regular butter are prone to burning at the temperatures needed for that quintessential sear, whereas clarified butter excels, resulting in not just visual appeal but also a rich layer of flavor that’s hard to match.
Conclusion
The journey to mastering perfect grill marks on steak combines a blend of aesthetics and flavor that elevates the grilling game. We’ve explored the importance of prepping the grill with the right temperature, the precision in positioning the steak for those well-defined marks, and the crucial timing necessary for a tasty, visually stunning crust. The significance of the Maillard reaction in achieving perfect grill marks on steak cannot be overstressed, as it is the chemical maestro behind the flavors we cherish.
Summing Up the Art of Perfect Grill Marks on Steak
Perfecting grill marks on steak is an expression of culinary skill, attention to detail, and patience. The techniques outlined throughout our guide serve as the building blocks for creating those irresistible char lines coveted by steak aficionados. From the specific type of fat used, such as clarified butter, to the strategic sear-and-move approach – each step is pivotal in acquiring those perfect grill marks that speak volumes about your proficiency at the grill.
Expanding Your Grilling Techniques for Better Flavor
Expanding your grilling techniques with methods like the reverse sear not only optimizes the look of your steak but profoundly enhances the flavor. Embracing these practices will not only enable you to achieve perfect grill marks on steak but also improve the overall taste and texture of your meat. With the application of these cooking tips and a little practice, you could exceed the quality of steaks found in high-end establishments, bringing a touch of gourmet to your home-grilled meals. So, fire up the grill, embrace these techniques, and elevate your grilling game to deliver that perfect sizzle each time.
FAQ
What is the ideal temperature for achieving perfect grill marks on a steak?
The ideal temperature for grilling steak and getting perfect grill marks is between 500 – 550°F. Preheat your grill with the lid closed for about 15 minutes to achieve a consistent temperature across the grates.
What technique should I use to create diamond-shaped grill marks?
To create diamond-shaped grill marks, start by positioning your steak on the grill at a 45-degree angle to the grill grates. First, sear the steak until it easily lifts off the grate, then give it a quarter turn (45 degrees) to create the diamond pattern. After some time, flip the steak and repeat the process on the other side.
How do grill marks affect the flavor of the steak?
Grill marks themselves are a sign of the Maillard reaction, which creates a rich flavor profile on the surface of the steak where the meat has direct contact with the grill. However, for an all-encompassing flavor, you should aim to encourage the Maillard reaction across the entire surface of the steak, not just where the grill marks are.
Can you explain the two-zone grilling method and its benefits?
The two-zone grilling method involves creating separate heat zones on your grill—one with direct high heat and another with indirect lower heat. This setup allows you to cook the steak at a more controlled temperature, avoid burning, and move the steak to the high heat zone to sear it at the end of cooking, achieving a perfect crust and internal doneness.
What is the reverse sear technique and when should I use it?
The reverse sear technique is perfect for thick steaks. Start by cooking the steak slowly on the indirect heat side of the grill, then once it’s nearly at the desired internal temperature, move it to the direct heat side for a final sear over high heat. This ensures an evenly cooked interior with a perfectly seared exterior.
Why is cleaning and oiling the grill grates important before grilling steak?
Cleaning the grill grates ensures that your steak has direct contact with the heat, which is crucial for forming crisp grill marks. Oiling the grates prevents the steak from sticking and helps create a beautiful sear. Use a high-heat cooking oil for the best results.
How does clarified butter contribute to achieving perfect grill marks?
Clarified butter has a higher smoke point than regular butter, and because the milk solids have been removed, it won’t burn as quickly. This makes it ideal for grilling at high temperatures. Brushing your steak with clarified butter before grilling can help achieve well-defined grill marks and add rich flavor.
What are some tips for creating beautiful grill marks on steak?
To create beautiful grill marks, make sure your grill is very hot and the grates are clean and oiled. Place the steak on the grill and let it cook without moving until it releases easily. Then, rotate it 45 degrees to create the sought-after crosshatch pattern. Cook the other side the same way, and use an instant-read thermometer to ensure perfect doneness.
Is it necessary to let steak rest after grilling, and if so, why?
Yes, it is crucial to let your steak rest after grilling. Resting allows the juices to redistribute throughout the meat, which results in a juicier, more flavorful steak when it’s time to slice and serve.
How do I ensure that my steak is cooked to my desired doneness?
Use an instant-read thermometer to accurately gauge the internal temperature of your steak. For rare, aim for an internal temperature of 120-130°F; medium-rare 130-135°F; medium 135-145°F; medium-well 145-155°F, and well-done above 155°F. Always rest the steak before serving to allow the juices to settle.
Why do some chefs prefer an all-over sear instead of defined grill marks?
Profound flavors develop over the entire surface of the steak during the Maillard reaction, not just under the grill marks. An all-over sear ensures the entire surface has a delicious, caramelized crust, offering a richer taste experience similar to what is served in high-end steakhouses.
How do I make clarified butter for grilling?
To make clarified butter, slowly melt unsalted butter over low heat. Allow the milk solids to separate and rise to the top. Skim off these solids and pour the remaining clear (clarified) butter into a container, discarding the water and solids at the bottom. You can now use this clarified butter for a higher-heat, flavor-enhancing sear when grilling your steak.


